As autumn arrives, pumpkins become the stars of seasonal decor. While carving is a classic tradition, painting offers a fun and creative twist that anyone can enjoy. Whether you’re a seasoned artist or just looking for a simple craft to do with kids, easy pumpkin painting ideas can spark imagination and add a personal touch to fall festivities.
Easy Easy Pumpkin Painting Ideas Overview
Pumpkin painting offers a versatile way to add creativity to autumn decor. Various techniques provide options for all ages and skill levels.
Classic Color Splashes
- Bright Colors: Use bold shades like orange, yellow, and green for traditional looks.
- Metallic Finishes: Incorporate gold or silver paints for a sophisticated touch.
Fun Character Designs
- Cartoon Themes: Paint friendly faces or popular characters to engage children.
- Seasonal Characters: Create designs inspired by autumn figures like scarecrows or witches.
Nature-Inspired Patterns
- Leaf Motifs: Utilize stencils for leaf patterns in earthy colors.
- Floral Arrangements: Paint flowers to bring a touch of springtime into fall decor.
Creative Techniques
- Sponge Painting: Use sponges for a textured effect, creating depth and interest.
- Splatter Technique: Flick paint for a fun, abstract look that adds personality.
Personalized Touches
- Name Designs: Personalize pumpkins with family names or fun quotes.
- Photo Collages: Incorporate decoupage techniques to adorn pumpkins with printed images.
Using these easy painting ideas makes pumpkin decorating a joyful experience, suitable for both individual projects and group activities.
Simple Techniques for Pumpkin Painting
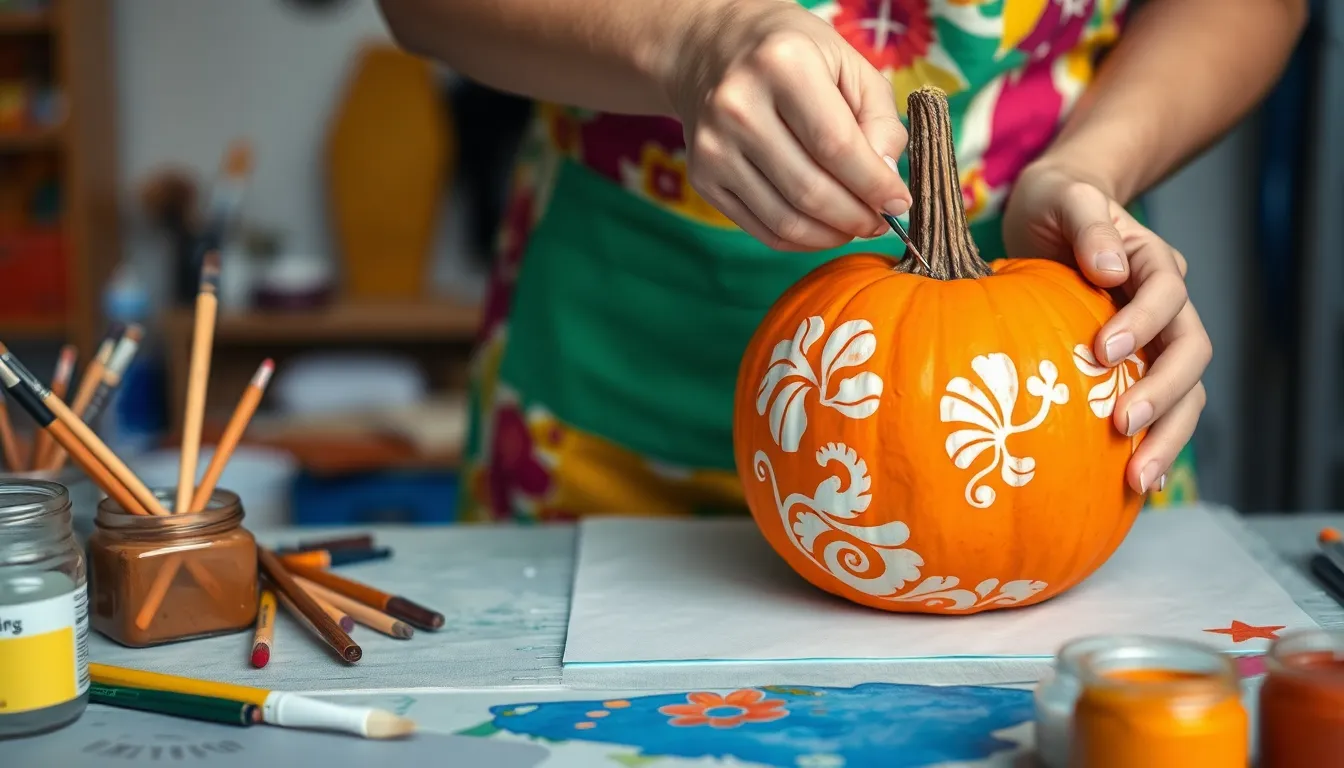
Various techniques simplify pumpkin painting while enhancing creativity. Two popular methods include using stencils for precision and applying freehand painting skills.
Using Stencils for Precision
Stencils offer an easy way to achieve clean, professional-looking designs. Choose sturdy materials like cardstock or plastic for longer use. Follow these steps:
- Select a Design: Find or create a stencil pattern that fits the desired theme or style. Halloween, fall motifs, or personalized messages work well.
- Cut the Stencil: Carefully cut out the design using a craft knife. Ensure all edges are clean to avoid smudging paint.
- Secure the Stencil: Use painter’s tape to hold the stencil in place on the pumpkin. This prevents movement while painting.
- Apply Paint: Dab or brush paint onto the pumpkin through the stencil openings. Use a sponge or brush to ensure even coverage without excess paint seeping under the stencil.
- Remove the Stencil: Once the paint dries slightly, gently peel away the stencil for a crisp design.
This method allows for repeat designs on multiple pumpkins or creating matching decor without the fuss.
Freehand Painting Tips
Freehand painting promotes unique expression. Follow these tips to create standout designs:
- Choose Your Tools: Use a variety of brushes for different effects. Flat brushes work well for broad strokes, while detail brushes suit intricate designs.
- Start with Light Colors: Begin with lighter shades as base layers. This technique provides a good foundation, making it easier to layer darker colors later.
- Use Thin Layers: Apply multiple thin coats rather than one thick coat. Thin layers dry quicker and help prevent drips or smudges.
- Practice on Paper: Sketch designs on paper before painting on the pumpkin. This practice allows for adjustments and familiarity with the chosen design.
- Incorporate Texture: Experiment with sponges or other texturing tools for added dimensions and effects.
This freehand approach results in one-of-a-kind pumpkins, showcasing individual artistic flair while keeping the process enjoyable.
Creative Pumpkin Painting Ideas
Exploring creative pumpkin painting ideas opens up endless possibilities for fall decorations. These ideas cater to various artistic expressions, ensuring enjoyment for everyone involved.
Whimsical Animal Designs
Whimsical animal designs transform pumpkins into playful creatures. Examples include:
- Cats: Use black paint for a classic look, adding white eyes and whiskers for detail.
- Owls: Paint pumpkins in shades of brown and cream, incorporating large eyes and feather patterns with a brush or sponge.
- Bunnies: Apply soft pastel colors along with facial features to create adorable bunny pumpkins.
- Ladybugs: Choose a red paint base, then use black for spots and facial details, making charming ladybug designs.
These designs provide fun themes that entertain children while allowing for imaginative creations.
Nature-Inspired Patterns
Nature-inspired patterns offer a beautiful way to celebrate the season. Options include:
- Leaf Motifs: Paint vibrant fall leaves in varying shades like orange, yellow, and red for an eye-catching effect.
- Floral Arrangements: Incorporate seasonal flowers, using soft colors and detailed brushwork for elegant finishes.
- Branches and Vines: Create intricate designs with dark green or brown paint, adding depth with lighter shades.
- Sunset Scenes: Blend colors like pink, purple, and gold to depict a sunset background, complemented by silhouettes of trees or mountains.
These patterns capture the essence of autumn and enhance the aesthetic appeal of decorated pumpkins.
Seasonal Themes for Pumpkin Painting
Seasonal themes enhance pumpkin painting by connecting artistic expression with the fall spirit. Exploring Halloween and fall harvest concepts offers inspiration for vibrant and thematic designs.
Halloween-Inspired Designs
Halloween invites creativity with spooky and whimsical designs. Consider these popular ideas for Halloween-themed pumpkins:
- Classic Jack-o’-lanterns: Transform pumpkins into traditional jack-o’-lanterns with carved faces or painted expressions. Bright orange paint enhances the festive look.
- Ghoulish Characters: Paint pumpkins to resemble ghosts, witches, or bats. Black and white shades allow for eerie elements, while bright colors add a playful twist.
- Monsters and Creepy Creatures: Use bold colors and exaggerated features to create fun monster designs. Details like googly eyes and fang-like shapes evoke a humorous Halloween atmosphere.
- Haunted Scene: Paint a spooky landscape with haunted houses, bats, and eerie trees for a dramatic effect. Dark backgrounds with glowing paint elements enhance the mystery.
Fall Harvest Concepts
- Autumn Leaves: Paint pumpkins with vibrant leaf designs in hues of red, orange, and yellow. Use a sponge technique for a textured finish that mimics real leaves.
- Gourds and Cornucopias: Create arrangements featuring other autumn symbols, such as various gourds and cornucopias. Use a palette of earth tones to reflect the season’s palette.
- Sunsets: Capture the beauty of fall sunsets by blending warm colors to create ombre effects. A sunset backdrop adds a stunning visual element to any pumpkin.
- Harvest Symbols: Paint traditional harvest symbols like acorns, apples, and wheat. These images represent the spirit of thanksgiving and enhance the festive appeal of the pumpkins.
Materials Needed for Easy Pumpkin Painting
Successful pumpkin painting requires specific materials. Gather the following items for a fun and creative experience.
Paint Types and Brushes
Select the right paint types to achieve vibrant results.
- Acrylic Paint: Acrylics offer bright colors and quick drying time. They adhere well to pumpkin surfaces, making them a favorite among pumpkin painters.
- Spray Paint: Spray paint provides even coverage and a variety of finishes, including matte and metallic. It’s perfect for achieving a uniform look.
- Tempera Paint: Non-toxic and easy to clean, tempera paint works well for children. It offers a range of colors but may not be as durable outdoors.
- Paintbrushes: Utilize varying sizes of brushes for different effects. Flat brushes work for broad strokes, while detail brushes assist with intricate designs. Sponges can create textures or backgrounds with ease.
Preparing Your Pumpkin
Proper preparation enhances painting results.
- Cleaning: Clean the pumpkin thoroughly with soap and water to remove dirt and wax coatings. This ensures better paint adhesion.
- Surface: Sand the area to be painted lightly, if necessary. A smoother surface allows for cleaner lines and details in the artwork.
- Drafting Design: Sketch designs lightly on the pumpkin’s surface with a pencil or chalk. This step facilitates precision and aids in planning color placement.
- Sealing: Consider applying a clear sealant or primer. This will protect the pumpkin and prolong the durability of the paint, especially for outdoor displays.
Embracing pumpkin painting opens up a world of creativity and fun for everyone. With a variety of techniques and themes to explore, individuals can easily personalize their autumn decor. Whether opting for whimsical characters or elegant nature-inspired designs, each painted pumpkin becomes a unique expression of artistry.
The process not only enhances the festive atmosphere but also fosters quality time with family and friends. By utilizing simple materials and following easy steps, anyone can transform ordinary pumpkins into extraordinary pieces of art. This fall, let creativity shine through painted pumpkins, making every celebration memorable and vibrant.